
 iPhone Data Recovery
How to use iOS Viber Backup & Restore
Preparations you need to do:
- Mac OS X 10.8 - 10.12
- iOS devices
- Others: iTunes installed
- Part 1. Backup Viber Chats on iPhone/iPad to Mac
- Part 2. View and Restore or Export Viber Chats on Mac
After launching the Dr.Fone on your Mac, choose "More Tools" on the left side and you'll see the screen as follows.

Next, let's check how to use the features here one by one.
Part 1. Backup Viber Chats on iPhone/iPad to Mac
To backup Viber chats on your iPhone/iPad, you should choose "iOS Viber Backup & Restore". Then connect your iPhone/iPad to the computer. Once your device is detected, you will see the screen below.
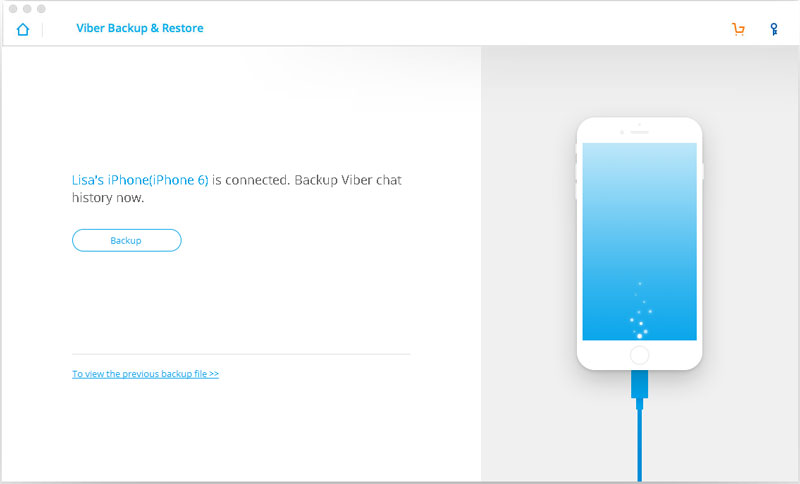
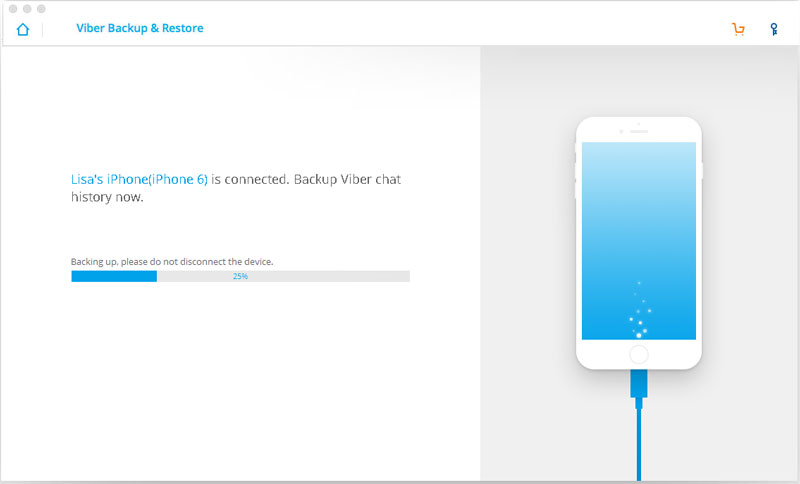
Click on the "Backup" button, and the program will start working automatically. Wait until the process is complete. During the whole process, keep your device connected all the time.
When the backup process ends, you will see the screenshot below.
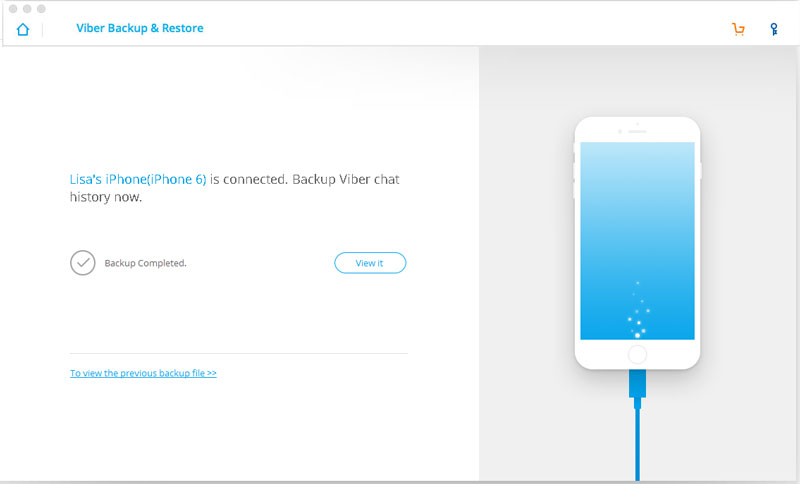
If you want to check the backup file and export the content, you can continue reading.
Part 2. View and Restore or Export Viber Chats on Mac
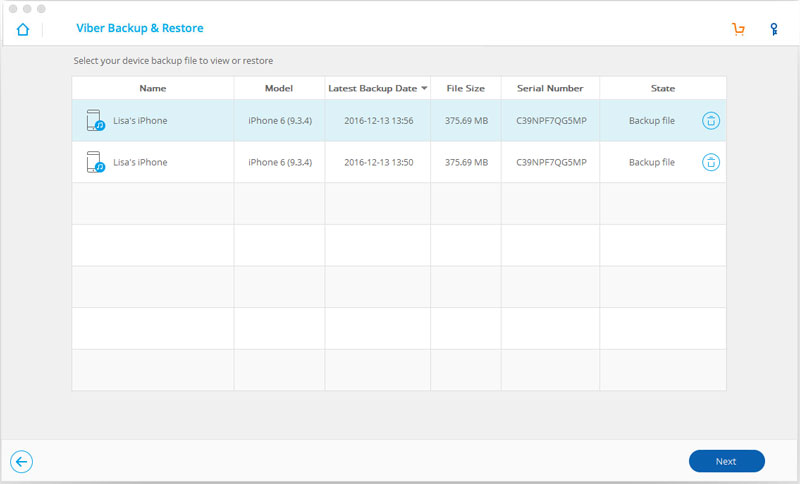
To check the backup file's content, you can click on the "To view the previous backup file >>" on the first screen.
Here you will see all backup files of your Viber chats, Choose one you want to check and click on the "View" button.
When the scan stops, you can preview all contents in the backup file, including text chats, call history and viber attachments. You can check any item you want and click "Restore to Device" or "Export to PC".

- Email us to support@macblurayplayer.com with detailed information of your device such as device model, build number, kernel version and else.
- Comment us on Macgo Facebook Page, reply to any post or send us a message.
The first and best Blu-ray media player for Mac. Support Original Blu-ray Menu, ISO files, and BDMV folder, etc.
Mac Download BUY NOW