How to Use iOS Data Recovery
The iOS Data Recovery program is the first iPhone and iPad data recovery software in the world. It has the highest recovery rate in the industry, and is able to recover photos, videos, contacts, messages, notes, call logs, and more. After Buy the Product and Download the Program, here presents the simple steps to complete the recovery project on Windows.
System requirements:
- Supported OS: Windows 10 /8.1 /8 /7 /Vista /XP
- Supported Device: iOS devices
- CPU: 1GHz (32 bit or 64 bit)
- Hard Disk Space: 200 MB and above free space
- RAM Space: 256 MB or more of RAM (1024MB Recommended)
- Others: iTunes installed
Part 1. Recover Data from iOS Device
Connect your iOS device to the computer using a USB cable. The program will automatically recognize the iOS device.
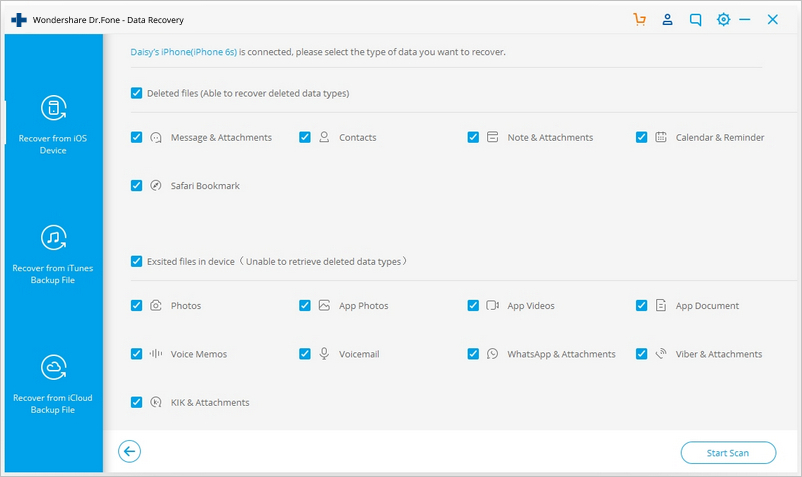
Click on "Start Scan" and the program will scan your iOS device for lost data. Once you find the data you want to recover, you can click on "Pause" button to end the process.
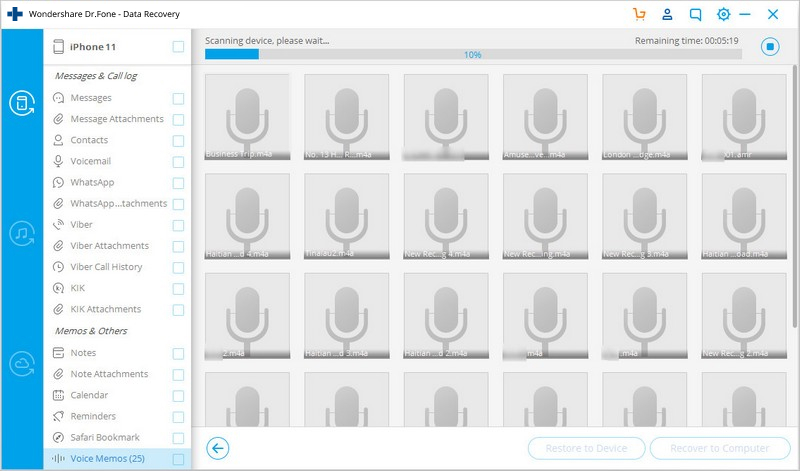
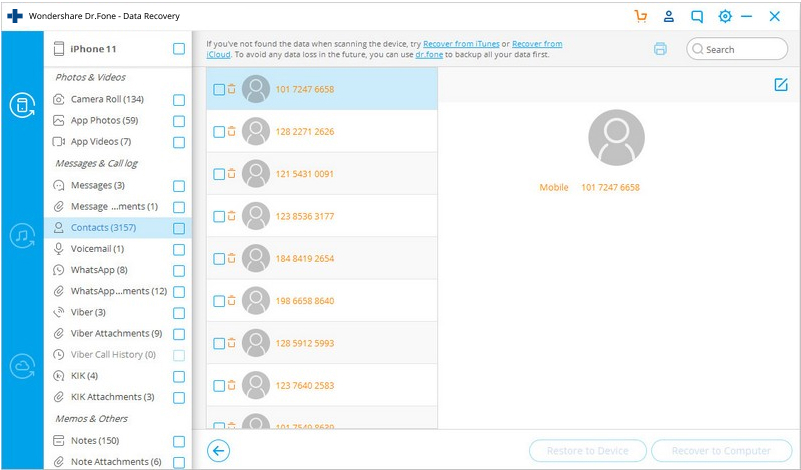
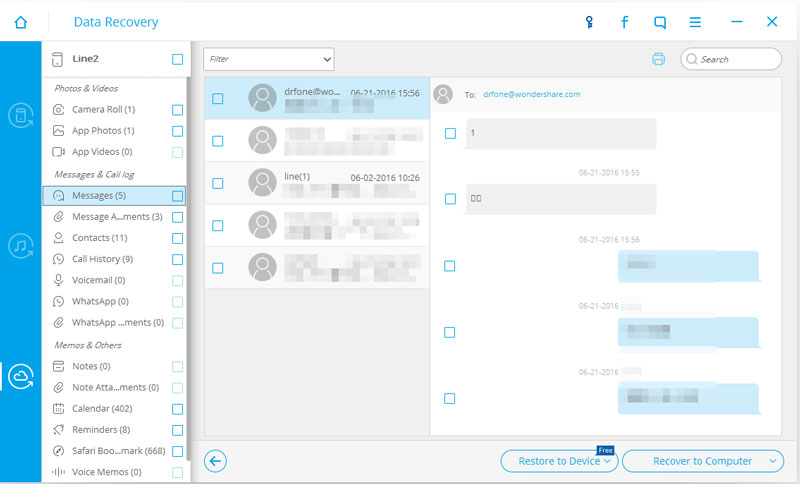
When the scanning process is finished, you will see the result displayed in catagories on the left of the window. If you only look for the lost data, you can swith the option "Only display the deleted items" to turn it on. Also you can type the items you want in the search box at the top right of the window. After you find the data you want to recover, select them and choose to recover them to the device or the computer at the bottom of the window.
Part 2. Recover Data from iTunes Backup
After launching the program, click on "Recever from iTunes Backup File". The program will detect all iTunes backup files automatically.
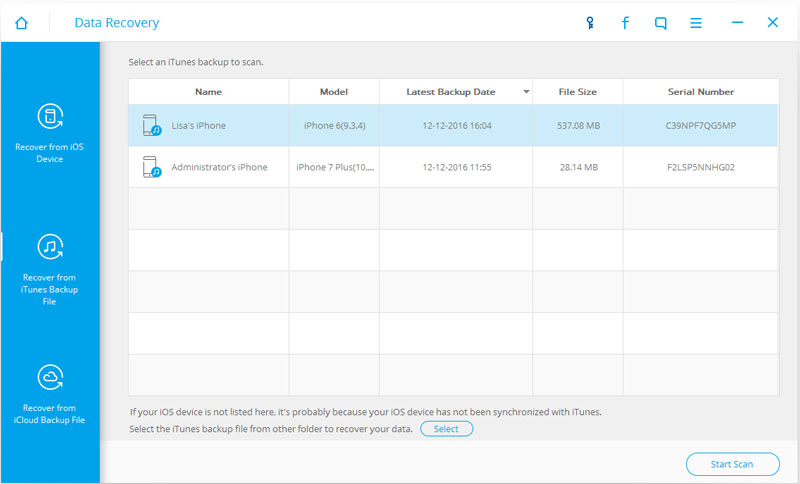
You can choose the files you need and click on "Start Scan" to extract detailed data from the files. It will take some time for the program to display them in catagories.
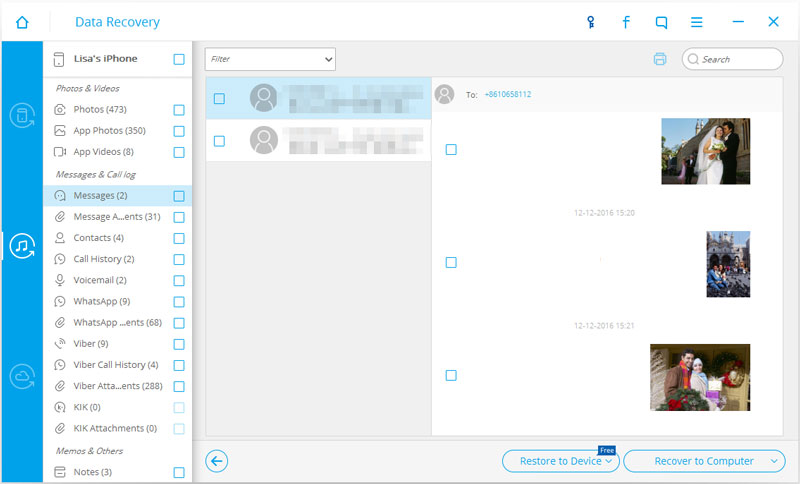
After you find the data you want to recover, select them and choose to recover them to device or computer at the bottom of the window.

Part 3. Recover Data from iCloud Backup
After launching the program, click on "Recever from iCloud Backup File". Then you need to sign in with your iCoud account.
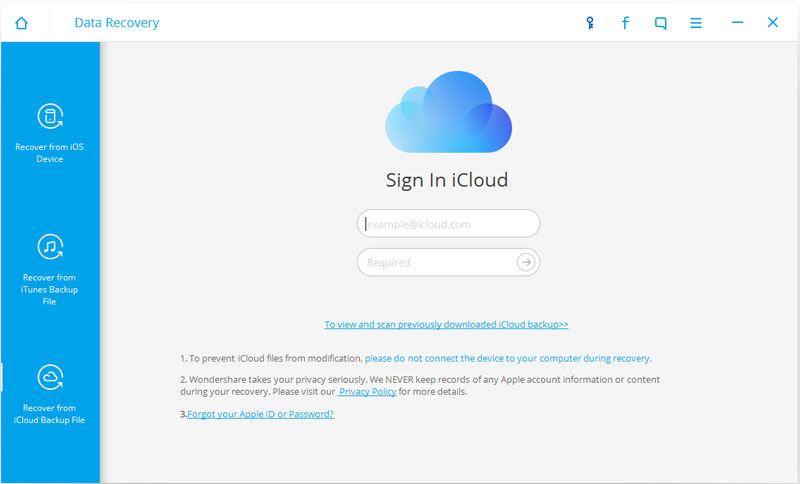
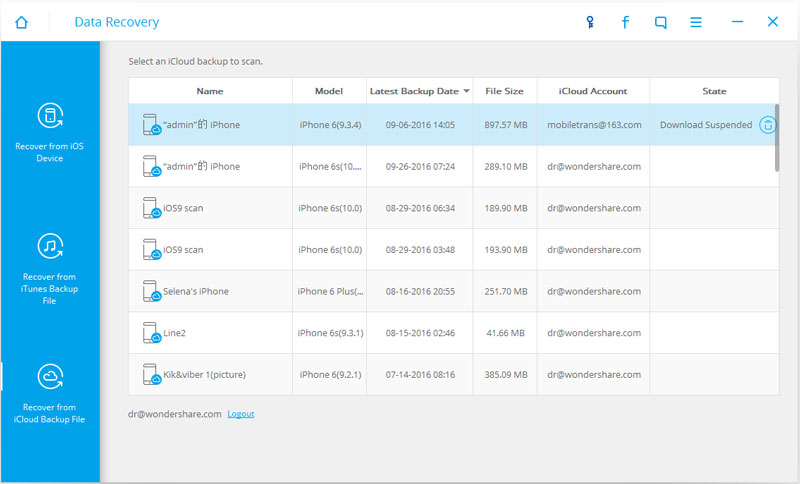
After logging in, the program will list all of your iCloud backup files. Select the files you want to recover and click on "Download".
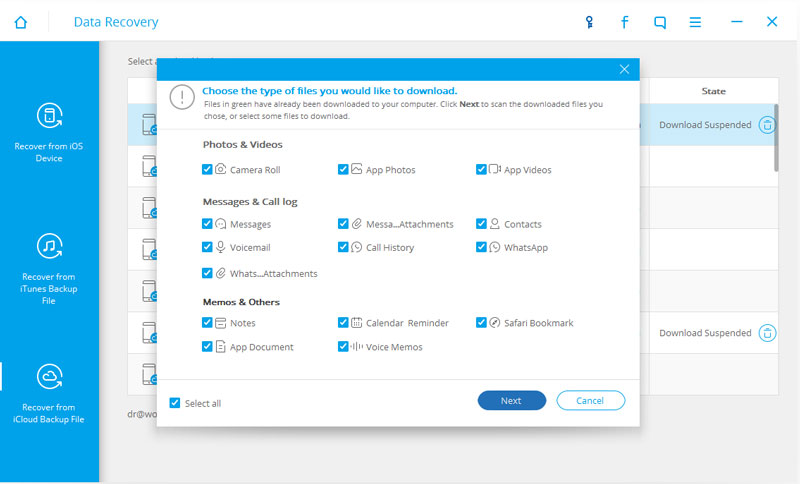
There will be a pop up window for choosing the types you want to download, which may reduce the download time. After that, click on "Scan" button and wait for a while. Then you can scan the content you chose.
After you find the data you want to recover, select them and choose to recover them to device or computer at the bottom of the window.
- Email us to support@macblurayplayer.com with detailed information of your device such as device model, build number, kernel version and else.
- Comment us on Macgo Facebook Page, reply to any post or send us a message.
The first and best Blu-ray media player for Mac. Support Original Blu-ray Menu, ISO files, and BDMV folder, etc.
Mac Download BUY NOW

